100% Scratch!

I’d like to take a moment to interrupt the regularly scheduled bread events to share today’s lunch, prepared 100% de scratcho. I made the lovely seeded marble rye in school. The tempeh is from my previous makings (it kept very well in the freezer). The flavor is so delicate I didn’t want to alter it by breading or marinating. I just steamed the tempeh for 20 minutes to kill any unwanteds then seared it in a little canola oil for color, crispness and a little fat. The sauerkraut is my latest love, it is from a red cabbage and is a shocking shade of magenta. The sprouts are radish seeds that have quite a spicy kick to them.  The cheez sauce is from the Uncheese Cookbook (Swiss White Melty Cheez recipe). I’m not too excited about the cheez, but it’s an effort and it added to a creaminess in the sandwich. Please let me know if there are any keepers in that cookbook; I know I won’t have the patience to cook them all….

Day 8: Chocolate Sour Cherry Bread, Roasted garlic Jack, Parmesan Bread


Our last day!

After seven days of constant, all-day bread baking marathon, my freezer is stocked for the rest of the summer and I feel like I have gotten my clogs wet with techniques. I’m so happy we were able to negotiate an independent study. I’ve always wanted to learn more about bread and doing this intensive has only made me want to bake more bread (but not at home, we can barely eat what we have!). It’ll be interesting if when I come back from Peru I seek out more of the bread world than savory land. I surprised myself about how much I love baking vegan desserts, not being much of a dessert consumer myself. But I love the science of it, the math of it, the getting covered in flour and dough stuck to my forearms for hours. The domestic arts really need to make a comeback if I have a say in what the food demand is in this country. Support your local farmer and bread baker (and sauerkraut maker, please!).


Banneton stylizing.

Well, here’s a synopsis of the last day in bakersville. On day 6 we roasted 12 bulbs of garlic, grated a hunk of dry jack cheese and made our pre-ferment for the Roasted Garlic Jack bread. Day 7 we made the dough for the same bread and let it bulk proof. When it was done bulk proofing, we heavily floured pretty bannetons and placed some sage leaves on the bottom (with more flour). We scaled out about 8 oz of dough, bouled it up, let it do a mini proof for shaping purposes, then we flattened the dough out and placed about a tablespoon of roasted garlic and a tablespoon of cheese. We folded the corners up and pinched them together, sealing the yums INSIDE the boule.


Awaiting the oven.

Poof! Into the banneton, cover with plastic and proof overnight in the refrigerator (because we really don’t have ALL day). Day 8 rolls around and we let the dough warm up at room temperature a bit, then plop onto the rug and whoosh into the oven with 1 second of steam.


Perfect bake time.

This is truly the most beautiful bread I have made thus far. Banneton rings, a little leaf of sage…to only cut into this bread and have pockets of garlic. I could live on garlic. Is that possible? I wonder if anyone has tried…I juiced one clove of garlic once into a 16 oz beets and greens juice and it burned my throat. Perhaps I won’t subsist on garlic alone.


Bulk fermentation with lots of chocolate!

The chocolate sour cherry bread sounds more exciting that it really was. No offense, it was very good, had a great proportion of chocolate and cherries to bread. My only issue was…it was bread (not a brownie). I think when I bit into it I wanted brownie gooeyness and more sugar than the doughiness that bread provides. Perhaps if I was into tea time this bread would do quite nicely, but alas, I am not much of a consumer of desserts. Haven’t I mentioned that already? But I will happily make you a wedding cake with much love, don’t be mistaken. Just don’t expect me to eat the whole thing.


Tongue technique.

The Parmesan bread was good, since Parmesan IS cheese and contains addictive components as well as salt and fat. Who doesn’t have a taste for salt and fat? Not me. This bread was yummy, didn’t need much in the way of eating: slice, toast, consume (perhaps a little earth balance is a nice touch). The bread was fun to make; we learned a tongue technique, which makes a fun crunchy flap on top when baked (see top photo). After the usual routine of pre-ferment, bulk ferment, scale and shape (into a 3 fold rectangle), we pulled a piece of the dough out, about an average human tongue size and length and heavily floured it (so it won’t stick to the bread and get soft) and rolled the dough towards the flap. We proofed in bannetons, tongue side down, then flipped them over onto the rug to bake away. I should have a prettier close up of this bread, I will search the folders.

Adieu, sweet savory bread. I will miss kneading you and stuffing garlic into your folds of glutenous love. We will meet again.

Day 7: White Trash Day


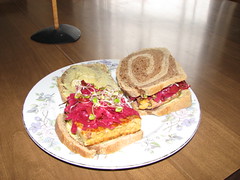
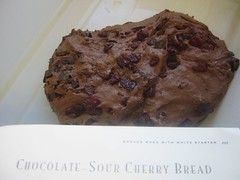
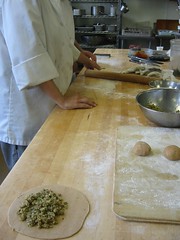
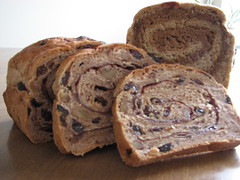
Good ole’ swirly bread.

Apparently my desire to learn the breads of my childhood does NOT impress my classically trained chef-instructor who has a passion for the natural fermentation process. I am excited about cultivating yeast and making artisan bread, but a well-rounded bread intensive would not be complete without some marble rye and cinnamon raisin swirl bread. So begins white trash day, much to the chagrin of the Chef. But what fun! The cinnamon swirl was a favorite of husband and the marble rye was perfect to showcase my homemade sauerkraut and tempeh. There’s room in my world for the artisan breads and white breads to live in harmony.
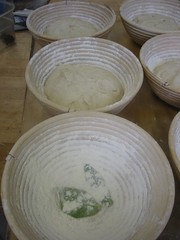
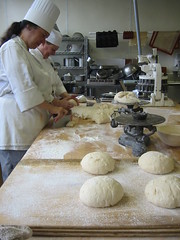
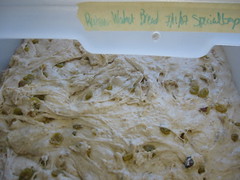
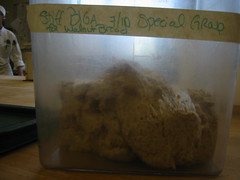
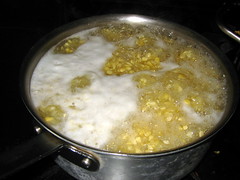

CR Bulk proof.

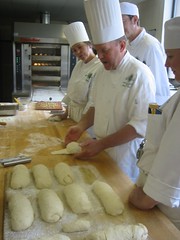
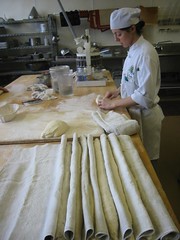
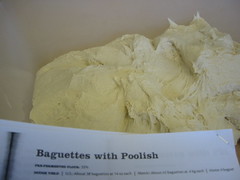
These breads have a basic bulk proof with active dry yeast and no pre-ferment. The marble rye definitely looks like it’s hard to make, but it was quite simple. The light and dark doughs had the same ingredients, except for coffee extract/food coloring/caramel color for the darker one. All I did was roll the dough out after its proofing, then roll the other one, sandwich the dough rectangles and roll towards me, lengthwise. Bam! A loaf of dough.
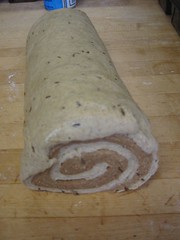
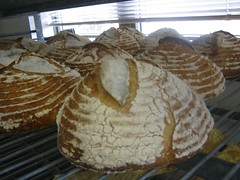
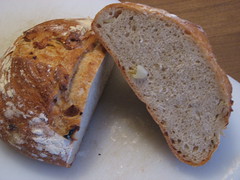

Marble log.

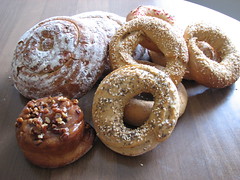
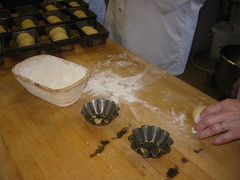
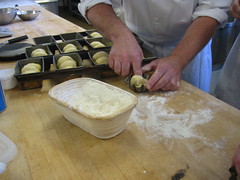
At school we have lots of fun pans so we got to use the pan that is the size of a loaf of bread. Short proof in the pan, then bake and cool and eat. Totally demystifed. The cinnamon swirl bread was kinda like the marble rye, just one layer of dough…coat with butter and cinnamon and sugar, roll lengthwise, proof in pan and bake. I hope I didn’t ruin the magic, folks.


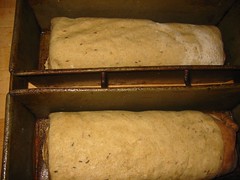
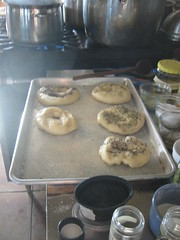
Marble rye in the loaf pan.

To be complete in our day’s theme, we made cracker bread. Also known as lavasch, cracker breads are sort of the precursor to Saltines. Same crunch and thickness, they are yummy but have a very short shelf-life. The next day they are stale. Luckily, the dough keeps just fine wrapped and refrigerated. Then it’s easy to bake just what you need.
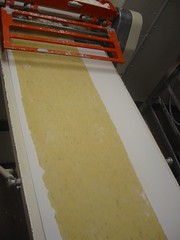
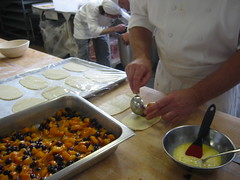
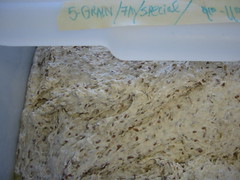
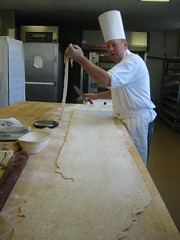
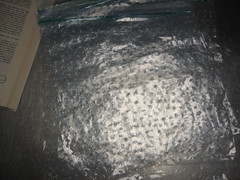

Cracker sheeting.

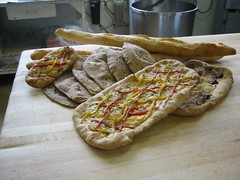
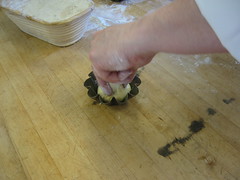
Our cracker was exciting because it was filled with rosemary (luxury!) and semolina flour. Semolina is (durum or hard winter) wheat that is coarsely ground to the size of grits. It’s popular in pasta dough and pizza dough. The grind gives pizza a nice crust, and helps it from sticking to the peel. We were blessed in that our school has a sheeter so we don’t have to roll it paper thin by hand. I wouldn’t mind it another time , but by using the sheeter we had more time to learn.
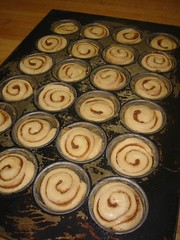
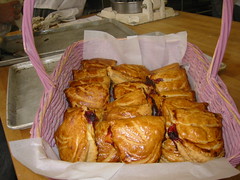
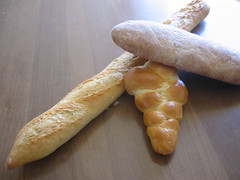

Finished crackers.

The crackers just get rolled out and baked. There’s no yeast in it, so the only leavening will be if there are bubbles in the dough. Once they were to the golden level we liked, we pulled them from the oven and brushed it with olive oil and seasoned it with Kosher salt. Yum!
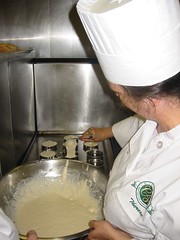
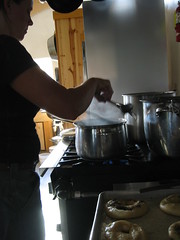
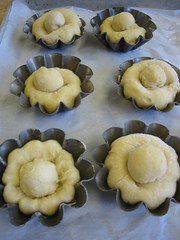
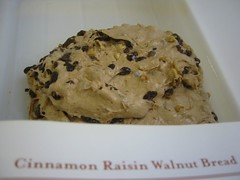

Crumpet pouring.

To give the day a kink in its style, we made crumpets. We followed a James Beard recipe, and ended up modifying it. Crumpets remind me of English muffins but pancakier. The batter looks like pancake batter but is cooked in little molds. You can cut out both sides of a tuna fish can and that’s the perfect size. We used little open tart molds to cook our crumpets. I like crumpets because they are doughier than English muffins and have nice pockets on the top for filling with maple syrup or nutella or jam. I have also discovered that you can re-heat them in the toaster and they still taste fine.
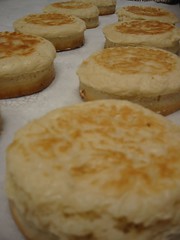

Crumpet madness.

English White Trash Crumpets
Yield: about 15

  • 1 lb bread flour
  • 16 fl oz milk of choice
  • 0.5 oz fresh yeast or 0.25 oz active dry
  • 1 tsp sugar
  • 1 tsp salt
  • frying medium (butter, earth balance)

1. Mix milk, yeast and sugar in a small bowl. Let it sit 5 minutes until it is frothy.

2. Sift flour and salt in a large mixing bowl and create a well.

3. Pour yeast mixture into well and whisk until well combined. Cover bowl and let it sit in a warm place for an hour.

4. Heat your griddle/frying pan and add butter. Once melted, place the forms and allow them to heat up.

5. Fill each mold about 3/4 to the top and cook on medium heat. Once the top is dry and full of holes (past pancake stage), remove the mold and flip the crumpet. Cook to your desired color and remove from heat.

6. Fill with butter, sugar, nutella, jam and eat!

Day 6: Sticky Buns, Bagels, Cracked corn bread


Quite the variety!

Today we learned the ins and outs of sticky buns. Basically they are pretty easy but sticky and full of sugar. Lots of sugar. We used a yeasted dough which definitely put it ahead of Cinnabon refined processed crap. We made a schmear, which is basically melted butter, brown sugar and honey. The schmear was for heavily greasing the pans (large muffin size). We tossed pecans in the bottom of the pans (to become the tops of the buns). The dough was straightforward, a bulk proof followed by rolling out the dough into a rectangular shape, about 1/2″ wide. I spread melted butter over the entire surface and dusted, well more of a heavy layer of dust (dirt?) of cinnamon and sugar on top of the butter. We rolled the dough width-wise into a log and cut it into 1″ pieces. Then we let the buns proof until they were coming out of the pan.


Buns before proofing.

Bake until they are golden and gooey. Dump out of the pan so the sugar glazes the whole surface and eat! I’m not much of a sugar addict, so mine sat in the fridge for 4 days and I reheated it in the oven and it still tasted good.


Sticky-cinnaminny

The cracked corn bread we made had black pepper, red bell pepper, jalapeno and cayenne pepper. What fun! We used a medium coarse cornmeal, less coarse than polenta (even though the recipe called for cracked corn, it still came out fine). It had a sponge starter that was made the day before, but that was practically a 1:1 sourdough with some active yeast added to jump-start the action. The bread also had durum flour in it, which gave it a really nice color. My only photo is in the group shot, but don’t worry, it all got eaten.


Awaiting the oven.


Boiling dem bagels!

We also got to make bagels, but don’t get excited because they weren’t true bagels…at least not to me. I miss the nice Jewish doughy bagels of the East Coast, perhaps I can obtain an internship and bring good bagels to the West Coast? Every transplant I’ve met out here says they can’t get a decent bagel-I think the market already exists…


Quillisascut Hearth

Anyways, the bagels had malt powder in them which seems strange to me. It made it taste nice, but malt? Why? I think it acts as a sweetener. I remember the bagels I made at Quillisascut last summer were amazing. It helped that everything we made was amazing and the bagels were baked in an outside brick hearth oven. I didn’t get any photos of the process at school, but you can enjoy our bagel process at the farm. Same thing: knead dough, proof, shape, proof, boil, top with yummies, bake, eat.

The bagels were scaled at 4 oz each and rolled into a cylinder, then the ends were rolled together in the palm of one hand against the table. Our chef was very adement to make the bagel hole quite large, since they proof again and “it is important to have a bagel hole, not a sphincter; you don’t want asshole bagels.” (a direct quote). I think we were quite amused and ended up making the holes bigger than necessary. I kinda like my bagels to have a smaller hole-it adds to the doughy factor. We decorated our bagels with a variety of hawaiian sea salt, beet salt, sesame seeds, poppy seeds and kosher salt (not necessarily all on one bagel). They came out really golden and delicious and I think I have 2 left in the freezer awaiting a grumpy morning. I definitely advise you to try making it on your own, it’s really satisfying and the taste of a hot bagel out of the oven is scrumptious! I need to find my Quillisascut recipe and then I’ll post it. It was much closer to East Coast bagels than these were.

Day 5: Aloo Paratha, Provincial Pizza, French Baguette


The spread.

Since it was a Monday and there was no “day before” to do pre-ferments, today’s breads were active dry yeast days. Not so much artisan but tasty nonetheless.

We had flatbreads on our bread wishlist (along with 39 other breads), so our Chef took liberties with our desire to do Naan and made us make pizza. Not that there’s anything wrong with pizza, but I’d rather be working on different shaping techniques than rolling dough to a flat shape and adding toppings. But my ignorance of Provincial style pizza didn’t help the day along. Provincial pizza dough is like a french bread and it’s about a medium thickness. No sauce, no cheese. We sweated onions and garlic for about a half hour and that was our base on the pizza. The recipe also called for anchovies. Lucky for me, one of my classmates doesn’t like anchovies so nix that ingredient! We topped the pizzas with roasted peppers and fresh thyme. It was good but the crust was a little too much like baguettes. I’ll stick to my thick, dense Sicialian dough or the thin crust brick oven baked dough. But I tried something new. Not as new as the Aloo.


Forming Aloo.

Aloo parartha is a type of Indian flatbread that conists of whole wheat flour, water and salt. No yeast! The filling contained a myriad of ingredients including potatoes, cilantro, mustard seeds, cumin, ginger, and jalapenos. The dough was straightforward and easy to make and without yeast, there was no proofing time. The filling took awhile to make but it’s complex rich flavor was worth it. We rolled out the dough as thin as we could get it and placed some filling on one side. We wet the edges with water and folded the dough over and sealed it. Then we rolled the dough/filling out again until it was about 7″. We oiled both sides, sprinkled the top with Szechan pepper and black sesame seeds and baked it until done. I hate how recipes say to “cook” something when they should specify sweat, saute, simmer, etc or to say bake until done. Everyone has a different definition of done. For example, our chef likes to bake his breads to a medium-dark brown. I like a golden brown crust on my breads and marshmallows.


Shaping baguettes to 21″

Anyhoo…back to the bread. We baked the aloo until it was a medium-brown. The recipe suggested to pan-fry it in ghee and I agree that some sort of fat needed to be added to the cooking. Baking it made it a little dry, but not dry enough to consider it inferior. We ate them up and enjoyed every bite of them.

We made baguettes again this week. They were a basic French bread with active dry yeast. I think I prefer using the levain starter for a more complex flavor…and I like the idea of using wild yeast over commercial yeast. But I won’t complain, I got to improve my shaping methods for shaping and scoring baguettes, which is an important skill to develop. Everybody likes baguettes, at least everyone I know.

Brioche exposed

This is brioche. The photo is someone else’s because I didn’t get a photo of the finished product. People love brioche and rave about it up and down. I don’t know how I had gone through life not having an opinion on it. Brioche is basically 95% butter. We tried to form it one afternoon and within minutes, the butter started melting out and it was impossible to form. Back to the walk-in with you! Anyways, it’s very pretty and behaves pretty well if you work fast enough. Our first day went very well in my eyes but apparently not to our chef’s. We shaped a few à tête, which has been described as having a fluted base and a jaunty topknot (which is quite lovely to say out loud) then he made us cram the rest into loaf pans, which is what you see in my Day 3 still-life.

So you may be wondering what is my opinion on brioche now? Sorry for the brioche lovers out there but I am not impressed. It tastes like butter. I like the taste of fat like most people but it was pretty boring for me. I’m more aromatically drawn with herbs, spices, floral scents…I even enjoy the yeastiness of bread. But brioche? I think I’d rather have challah. But I very much enjoyed the silly process of forming the autets. Enough to show everyone all about it. Perhaps I can just make brioche all day and not have to eat it. And I can sell it to the brioche lovers of the world….

First scale your brioche into 2.25 oz pieces and form it into a boule. Don’t use flour because the butter will stick to your table and allow you to create a nice, tight boule under your palm. Then refrigerate it because you’ve handled it too much and it’s starting to warm up.

Next, dip the pinky side of your hand into flour and roll the boule into a bowling pin shape by running your hand, pinky to wrist across the boule as if your hand was a dull saw. See photo for lovely bowling pin.

Using three fingers holding the pin’s neck, squiiish it straight into your heavily greased a tete pan until your fingers hit the metal.

Dip your index finger in flour and create a moat around your jaunty topknot, making sure it is centered and has space from the rest of the brioche. You should be able to hold the a tete upside down and make the ball dangle like those things boxers pummel. Smack the a tete on the table to let it know you mean business.

Proof for about 15 minutes then bake in a conventional oven at 350 deg F for about 20 minutes, or until the color is quite brown.
It’s best eaten warm and I enjoyed my brioche loaf sliced and treated to a vegan fronch toast batter. Of course, brioche is not vegan but it makes for a nice rich french toast. Maybe it can still be made with Earth Balance? I’m not going to test it. I’d rather eat something else. But I’d gladly make bowling pins and dangly balls any old day.

Day 4: Bread

Today was the last day of the week. We perfected our brioche technique and made chasson with the remaining puff pastry dough. Chasson is basically a sweet turnover. We used round fluted cutters and then rolled them into oblong shapes, filled it with apricots and blueberries, egg-washed the edges of one side and folded over the empty side of the dough and sealed it. Apparently we didn’t seal it well enough or we stuffed them with too much fruit. During baking, they puffed up fine but juices spewed everywhere. They still tasted delicious. The fresh apricots were tart enough to balance all of that butter in the puff pastry. Puff is also called feuilletage, which is French for “flaky”. When it is baked in the oven, the butter melts and creates an air gap, which puffs up and creates that rich, flaky pastry that has such a unique mouthfeel.


Ready to sell!

On the savory side of things, today wasn’t as productive as hoped. Chef cut a bread from our list today. I thought it was because we are slow workers, but apparently “The Buzz” (the store at school where we sell our goods to the public) was closed yesterday and we lost our work study people who staff the store. Which sucks for us because we have to make less food since we can’t sell it. Thankfully, one of my teammates has afternoons off and is going to work there while we are at school these two weeks. Next week we’ll get more breads together….I understand it’s a community college and we don’t have the funds like the Art Institute to just make food and throw it out–but I want to learn! I want to make as much bread as possible and get these techniques down. Each type of bread has it’s own technique for shaping. It’s beautiful and complex.


Scaling the dough.

Our bread today was a potato bread with roasted onions from Jeffrey Hamelman. This books seems to be the most commonly used and trusted book in our kitchen. The recipes are in US, metric and home conversions and they all have a baker’s percentage. I’m sure the methods are accurate, too, but our chef tends to use the ingredient list and move in a different direction. He tells us it all has roughly the same end result; bakers tend to adopt certain techniques that work for them, their kitchen and their equipment. Even something as simple as the order of which ingredient goes in the mixing bowl can vary. In our kitchen it usually tends to go: yeast, water, pre-ferment, flour, salt. There are exceptions.

This bread had a nice texture from the potatoes, but it didn’t have potato chunks. I think I prefer biting into a chunk of potato. The roasted onions were a delicious addition to the bread. It was enjoyable, but not the best bread ever. I tend to like having aromatics like herbs and spices to liven things up. We’ll see what next week holds.


Potato Bread with Roasted Onions.

Bread Intensive, Day 3


Golden Raisin-walnut bread, whole wheat croissant, 5 grain levain, brioche loaf, puff with goat cheese and heirloom tomatoes.

Today was amazingly productive. I think I now have some insight into the world of a baker. And I enjoy it, so it must be a good sign. Lots of multi-tasking. Yesterday, we made our pre-ferments for the 5-grain Levain and Golden Raisin Walnut Bread (with a stiff biga starter-which is yeasted starter that is set out to rise overnight. it is what gives Italian bread it’s unique earthy flavor and uneven crumb). A levain is a type of sourdough starter, consisting of natural yeasts that feed on flour. Levain starters are a French style and tend to be doughier (more flour than water) than most home sourdough starters (which are 1:1 flour/water ratio). Our chef started his levain using rye flour, since rye tends to have more yeasts naturally occuring in the flour. You hydrate the flour and let it sit out at room temperature for days. Some people add a little commercial yeast to get the starter started. Once the natural yeasts (which are in the flour, in the air, all around us) get going, they multiply and dominate the starter and the commercial yeasts eventually die out. The beautiful thing about yeast is that it is unique to your location, sort of like wine grapes. A San Fran sourdough will taste different than a Seattle sourdough just because the strain of yeast is different.

Pre-ferments are sort of a focused sourdough. For today’s preparations we took part of the levain mother and fed it with the proportions of flour and water specified by the recipe. We left the pre-ferments out at room temperature overnight to get the yeast busy so the bread will rise adequately for the next day. The 5-grain also consisted of a “soaker” which was a mixture of cracked rye, oats, flax and sunflower seeds that also sat out overnight (to soften and ferment a little). Both breads were pretty straightforward in making with a bulk fermentation, shaping, proofing and baking. They both were delicious and hearty. The hard work was with this turn business.


Chef squaring off croissant dough.

We finished all six turns of our puff pastry and three turns of the whole wheat croissants. Creating the turns is quite an elaborate process. Not only do we have to roll out the dough, but we have to roll out the butter to be exactly half the size of the dough. A nice cheater method is to lay plastic wrap on a half sheet pan, whip up a 2# of butter and spread it evenly on the sheet pan. Then refrigerate until firm. Once the dough has been rolled out to roughly the size of a full sheet pan, you can pop the butter block onto the dough and sandwich the other side on it. This is not a turn (but it’s one layer of butter). Our chef made us do one turn by hand, which must have taken about 15 minutes. The goal is to roll out the dough so that it’s three times the length of the original size, then fold it into thirds. THAT is the first turn. (now there are 3 butter layers). Standard puff pastry has 6 turns. We were lucky to use a sheeter that could roll out the dough in about a minute for us and we would fold it by hand. Thank goodness for that. I would never want to make this at home with my wine bottle rolling pin. The croissants have 3 turns. We had a hard time with those because we used a coarse whole wheat flour and it cut the gluten strands a bit, so some butter broke through during the rolling process. Chef said it was fine and since the dough was chilled while putting the turns on it the butter stayed in place.


Rolling croissants.

Once all the correct turns have been done (making a million or so butter layers) we rolled out the dough to #5 on the sheeter (about 1/8″ thick). We cut the croissants into 2.5 oz triangles and rolled them into the appropriate shaped and baked them. Rolling croissants was easier than I thought.  We used a bench scraper to cut out triangles of the rolled dough (about 3″ wide and 4″ long).  A slight tug was made to teh tip of the triangle, then we rolled, wide end toward the point.  Make sure to make your first roll tight, then just roll it towards you, keeping it cylindrical.  The puff was more exciting, like making paper snowflakes.  I think they baked up beautifully and now I have some more techniques under my belt apron.

Bread Intensive, Day 2

This week I have started a special bread intensive class at school. I know, I know, I graduated Culinary School last month. But there is still more to learn! I am not interested in taking the desserts and breads program (please, baking with endless eggs and butter? not my style) but I get so excited when my arms are elbow deep in dough.  Luckily, two of my friends are also interested so we set up a special independent study with the bread Chef.  We have dubbed ourselves the “Special Group.”  Yesterday we did a lot of pre-ferments for the week and only baked the challah. (I didn’t get to take a picture until I already nibbled away most of the loaf!) Challah was relatively quick and easy to make. I’m amazed at how many eggs are in it. I wonder if there’s a way to duplicate the texture in a vegan style?


Poolish baguette, Challah, Ciabatta with Wheat Germ & Olive Oil.

Today, Day 2 (of 8 ) was quite busy. While we had a leisurely lunch yesterday, today we filled our plates and the chef runs in and tells us we need to hurry and get the ciabatta in the oven. Otherwise it will over-ferment. Then we had about 10 minutes to eat before he ran back in to let us know the baguettes were ready. Five minutes later we had to run to get the ciabatta out of the oven. Ah, life as a baker. The bread has become our babies. I love it, though. Tending to it, making sure the yeast have a happy environment to do their thing; it is all very satisfying.


Beginning bulk fermentation.

Our ciabatta and baguettes today were made with a poolish starter that consisted of fresh yeast and equal parts by volume of winter wheat and filtered water. (Chlorine in tap water KILLS yeast). The baguette was relatively straightforward although I am not sure I can remember the individual techniques for kneading and shaping each dough. The ciabatta had wheat germ and olive oil in it. It’s not as greasy as some ciabatta I’ve had before, but it’s still delicious and rustic looking, with a great crumb.


The stiff biga pre-ferment for tomorrow.

We set up two pre-ferments for tomorrow, finished all 6 turns for our puff pastry (hooray for sheeters! Yesterday we did one turn by hand and it must have taken at least 10 minutes. It’s less than one minute in the sheeter), finished 3 turns for the whole wheat croissants, and formed the brioche into balls (which is sticky tricky business). We brought the brioche out to form into their cute 2 oz fluted pans but it was too hot in the kitchen and the butter melted right out of it. That will be finished tomorrow. Brioche is really funny. It’s mostly butter so it’s hard to handle. But the funny thing is forming them into their pans. First, you take the ball and turn it into a bowling pin. Then you smoosh it into the pan like a flower. Finally you form the center ball which, when done correctly, should dangle like a punching bag when held upside down. There’s technique for you! I’ll be sure to take pictures of the brioche process tomorrow.

tempeh trials

The tempeh story:

Once upon a time there was a girl who thought tempeh came from a magical place and underwent a laborious process in which fairies danced and chanting was necessary for the tempeh to be produced and brought to market.

This girl revered her tempeh for its nutritional content, tastiness and versatility. She wanted to showcase it as her entree protein at culinary school to show the meat hungry savages that there IS another way to eat and honor one’s body. A teacher who once brought her to tears with his criticism encouraged this girl to make it from scratch, thus showing her alt-charcuterie skills. And so begins the journey that is tempeh. May the fairies continue to bless the soybeans as they undergo fermentation.


    Soaked soybeans.

  1. Soak 1 lb. whole soybeans overnight OR bring beans and enough water to cover to a boil. Boil for 20 minutes and then soak for 2 hours. Drain beans of soaking water.
  2. Hand de-hull the beans by rubbing them vigorously between your hands OR pulse beans in a food processor until the majority of the beans have been split. I recommend hand de-hulling if you have a wraparound porch with a nice view or good company.
  3. Transfer beans to a large pot and cover with enough cold water to cover the beans by 2 inches.
  4. Bring the beans to a boil. Do not go to the store or fall asleep. The hulls will come to the surface with much force. Skim off as much of the hulls as you want to. The more hulls, the more fiber (but the texture will change a bit).

  5. De-hulling for dummies.

  6. Boil the beans for 40 minutes. While this is happening, prepare your incubation buddy. A zip-lock bag will work just fine (a gallon bag is good for 1 lb of beans). Poke holes (I used my digital thermometer point but anything pointy will work) about 1/2″ apart all over the bag. The bacteria needs air to breathe!

  7. A controlled boil.

  8. Drain the water from the cooked beans and spread them out onto a pan covered with a CLEAN towel. Cover with another towel and dry the beans well until they are “body temperature and skin dry.” (about 10 minutes)
  9. Transfer beans to a bowl and sprinkle the bacteria starter (I used 1 tsp starter from GEM per pound of dry beans).
  10. Spoon the bean-bacteria mixture into the zip-lock bag and pack it nicely so that the beans can easily become bound. (I like to make the tempeh about 1/2″ thick).

  11. Hulls for fiber!

  12. Place directly on the rack of a gas oven, in the middle. Prop the oven open with an apron or towel. The ideal temperature is 85-88 deg F. Check the temperature as often as you can. It is important that the first 12 hours the tempeh has an ambient temp of 85 deg. After that, the bacteria starts producing its’ own heat and can be moved if necessary.
  13. My tempeh was done after 22 hours, but the oven temp was hotter than ideal. Incubate 22-28 hours, until done.


The economy incubator.

“Done” tempeh is: firmly bound beans with white mycelium and smells mushroomy and fresh. Black/gray spots are okay. It should not smell like ammonia. Slice it, a thin slice should hold together rather well. If it is not ready, keep incubating it up to 36 hours total. If it crumbles or smells like garbage, throw it out and start again. My large batch wasn’t cohesive at the corner closest to the pilot light, so I cut that portion out and incubated it longer.

11. Wrap in plastic and refrigerate to kill the bacteria. Do not stack the tempeh until it has reached 41 degrees, or it will continue to ferment at contact points.

It will last 5 days in the fridge (though I’ve eaten it after a week) and apparently forever in the freezer.

Uses: sliced and fried, marinated and fried/baked for snacks, sandwiches; cubed for stir-fries, grated and simmered in marinara sauces and basically anywhere you want to add it. Most people recommend steaming the tempeh for 20 minutes before cooking it to de-activate the bacteria, but I don’t really do that step. My instructor at school took a bite of the tempeh while it was fermenting and he survived…I think you just need to be prepared for your stomach to potentially act up if it’s not used to bacteria. I’m a bit lazy and just make sure I cook it. My favorite way to achieve juicy, flavorful tempeh is to marinate it overnight in a mixture of water, soy sauce, maple syrup, garlic and ginger, then bake it for 60 minutes at 350 deg F. I cool it and use it for whatever (bread and fry, slice for tlt’s, etc.) Store any unused portions in the marinade for up to a week.